If you have an OpenID, it’s the most convenient way to access stikis. This is the first of three articles about my experiences of providing openid logins on stikis. In this post, I’ll try to explain what OpenID is in simple terms (and highlight the new affiliate signup feature on the stikis login and signup pages). I won’t be going into too much technical depth, but hopefully, if you’re not familiar with OpenID yet you’ll have a better idea of what it is by the end of the article (for another great introduction to OpenID, see this screencast by Simon Willison).
In the next post, I plan to discuss some of the early usability lessons I’ve learnt for providing OpenID logins, and highlight of the salient issues you might want to consider when providing OpenID on your own site. In the final part, I’ll show how I test the parts of stikis that use OpenID using the ruby mocha gem.
OpenID is a better way to prove who you are.
If you don’t have an OpenID, you’re probably wondering what I’m talking about. One way I could describe it is as a new way to log in to websites. The most common way of allowing logins to a website now is to ask people to enter a username and password to prove who they are. There are lots of problems with this. It means you have to remember lots of passwords, you have to trust every site you log into to keep your password secure and you have to update your personal information in lots of places if it changes.
What if, instead of needing a separate username and password for each website you visited, you could just tell the website to go and check an address that you own to verify that you are who you say you are? That’s how OpenID works. Here’s a really simple cartoon that shows the process of an OpenID login.

The key part of this process is that there is a place on the web that you can point to which will be able to verify you are who you say you are (Fred’s ‘friend’ in the cartoon above). In fact, OpenIDs look just like regular web addresses. For example, here’s one of mine…
http://jared.donovan.myopenid.com
If you click on it, you’ll be taken to a webpage that looks like this…
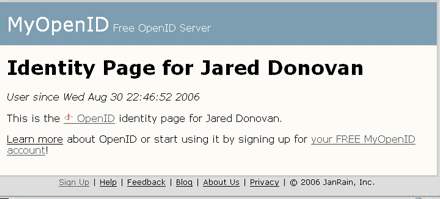
Getting an OpenID
This brings us to the next question - how do you get hold of an OpenID address that you can own and that can verify you? There are a couple of different options
- Set up your own OpenID server on a website that you control. There are several free OpenID libraries you can use to help you with this. Stikis uses ruby-openid, written by Brian Ellin.
- Get an OpenID account from any of several free services that are available. In the example above, you can see that I’ve got an account with MyOpenID.com, some others are pip.verisignlabs.com and GetOpenID.com, there are many others to choose from too.
- Add a link to a web-page that you own that will delegate the openid authentication process to another server. This is much simpler than it sounds, it’s actually sort of a combination of the first two options.
- Finally, you may find that you already have an OpenID without even knowing it. If you’ve got a LiveJournal account, your OpenID will be fred.livejournal.com (substituting your own login for ‘fred’).
Another way you can get an OpenID is through the affiliate sign up link that’s provided on the stikis welcome, login and signup pages. Beneath the openid login form, there’s a grey box that looks like this…
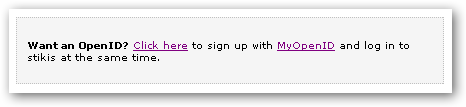
If you follow the ‘click here’ link you’ll be taken off to a MyOpenID signup page which is customised for stikis users. Once you’ve finished the MyOpenID signup process, you’ll be sent back to stikis and logged in automatically. It’s painless.
This magic is all courtesy of the MyOpenID affiliate programme. If you’re running a site and you’d like to make it easy the people who visit your site to get an OpenID, I’d suggest giving it a try. It’s really easy to set up, and the staff at MyOpenID are really great to work with…but I’ll talk more about that in the next post.