Quite a big update to the user interface yesterday, which changes the way the interface works a bit. There are four new features:
Zoom
You could zoom the page in the previous version of the site, but only using the buttons at the top of the page, (below).

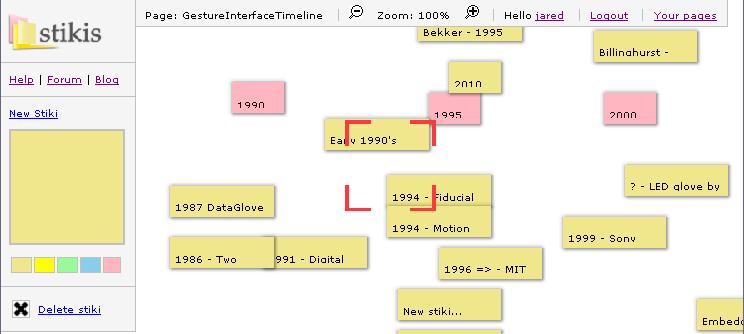
Those buttons are still there, but now you can also zoom using the scrollwheel of your mouse. It’s similar to the way zooming is done in map sites (eg. Google maps) so hopefully at least some users will be familiar with it. The way it works is when your mouse is over the page, you scroll up or down and the page zooms in and out on that spot. A target will appear to show where you are zooming to. The image below shows the target on a page that is in the process of zooming.
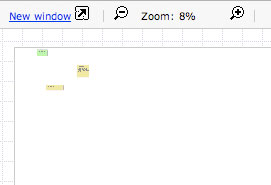
I’ve also added some constraints on how far you can zoom. Previously, you could just keep zooming further and further out or in, which was kind of pointess and lead to people not knowing where they were any more. Now you can zoom out to 8% and in to 160%, as the following two images show.

Hijacking the scrollwheel is not something I’d do lightly. However, I feel there are valid reasons for doing so in this case. First, there’s an established use of this in map software which some users will be familiar with. Second, the previous method of zooming by clicking buttons was tedious and didn’t give you controll over where you zoomed in on. Third, the traditional use of a scrollwheel in a webpage is to scroll down the lines of a vertical document. In this case, the document stretches in both vertical and horizontal dimensions, and moving horizontally required the user to use the scrollbar, or use the scroll-pan (is that what it’s called?) function. Neither of these were very satisfying.
There are still some improvements I’d like to make to the scroll-zooming. A big one is letting you zoom more by scrolling more. At the moment you have to scroll, then zoom a bit, then scroll again, then zoom some more. It frustrating to zoom more than two steps.
Pan
Okay, so I hijacked the scrollwheel. Even though there were some good reasons for that, I needed to give people another way to move around the page. The solution I’ve added in this release is to allow panning by clicking and dragging on the background of the page. Like the scroll-zoom feature, this is in common use on map sites and it’s also well established in graphics programs (such as photoshop) and the Adobe reader software.
After poking around a bit, I found that the CSS3 proposal includes cursors ‘grab’ and ‘grabbing’ (below) which are a nice fit with the established use. The idea is that you use the ‘grab’ cursor to indicate that something can be moved, and then the ‘grabbing’ cursor to indicate that the user ‘has a hold’ of it and can move it around.


Fortunately, Firefox (one of my target browsers) supports these cursors through the -moz-grab and -moz-grabbing declarations. Unfortunately, IE7 (my other target browser) does not. Fortunately, it’s possible to specify a custom image to use at the cursor using the following markup.
1
2
#target {cursor: url(/path/to/grab.cur), default;}
#target:active {cursor: url(/path/to/grabbing.cur), default;}
When the target element is active, the cursor should be changed from ‘grab’ to ‘grabbing’. This works for me on Firefox, but I couldn’t get it to work in IE7, so in that browser, the user only ever sees the grab cursor.
Another point to mention with this is that the files need to be in *.cur format. From what I can gather, this is similar to the *.ico format which is used for icons. I used a freeware program to turn the example gifs on the Mozilla website into the cur format.
Select
It’s been possible to select multiple stikis for a while now by holding down the control key and clicking on them. This worked fine if you only needed to select two or three stikis, but it was very tedious for large numbers of stikis. For a long time, I’ve had plans to implement a select box function, similar to what’s used in graphics programs.
The usage is fairly straight-forward, you hold down the control key and click and drag with the mouse to draw a select box. Any stikis that overlap with the box will be added to the selection.
Chuck
With the ‘chuck’ function you can select a stiki (or stikis) press Control+Shift and an arrow key and the stiki will be swooshed off to the edge of the page in the direction you specified.
This function grew out of my experience of using the stikis as reminders of things I need to do. I found it convenient to move the stiki off the side of the page once I had completed the task, but it was a pain to have to zoom out and move it to the edge using the mouse. I just wanted a quick way to ‘chuck’ it. And so another keyboard shortcut was born.
Summing up
My aim with stikis is to have an experience where you can move around and zoom in and out without feeling like it’s a chore. If you want to get an overview, you should be able to skip right out and see the big picture. If you want to narrow in on a single thought that should be easy too. The interface still isn’t at the level I want it to be, but I think these additions are a step in the right direction. If you’ve used the previous version, I’d love to hear your reactions to the changes. If you’re a new user, let me know what you think.