Reverse Mounting SMDs

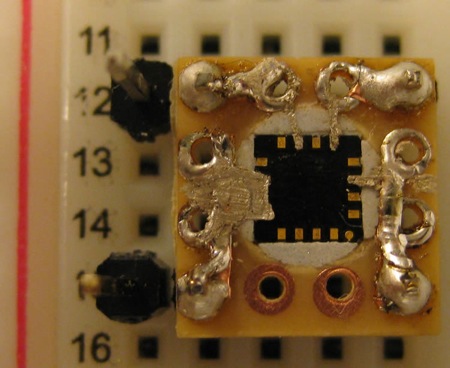
Interesting method for mounting SMD components. The “circuit writer” pens might also be worth checking out.
This tutorial for is those of you who absolutely need to mount a small surface mount device for prototyping purposes and do not have the means or time to pefrom a traditional surface mount.
Thanks to Jo for the tip.
Happy Australia Day

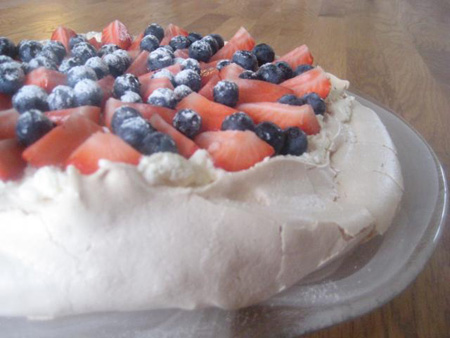
We had some friends over for a little Australia Day party on the weekend. My contribution was a pavlova, pictured above. It’s the first time I’ve ever made one and it came out pretty good. There were also Tim-Tams, vegemite rolls and a bottle of Hardy’s - all courtesy of Ben and Sarah.
I haven’t posted much about work in the past couple of weeks. It’s been pretty busy. Last week we had a research seminar at Sandbjerg for the SPIRE centre. It ran on Tuesday and Wednesday, but I only joined for the second day. Wendy and I ran a little workshop to tighten the proposal for our edited volume. The results were encouraging and we will meet later this week to put together a call for participation for the people who could not attend. I also introduced the SPIRE blog, which I recently set up. Hopefully it will turn into a place where we can start to build more of an online identity - something that’s been sadly lacking so far.
On Thursday, the first and second year students presented the results of their Design Specialization course. This is a three week course where the students are able to set their own topics and objectives. They are free to either work alone, or in a group. I think it’s a pretty interesting concept for a course and the results were very impressive. I supervised two of the groups that presented, one was called ‘Software as a Design Tool’, where the aim the students had was to get some hands-on experience using software such as Flash, Photoshop, Illustrator and Premiere. The students decided to combine their efforts to produce a video for the Segway track at Danfoss Universe, a local science park. The other project was called ‘Scrumgy’ and the purpose was to redesign an existing product (a networked media player) and rebuild it as a working prototype. It was really wonderful to see the dedication that all the students brought to their projects and the quality of the work that they produced in such a short period. We took some videos of the presentations they gave with the plan to put them up on YouTube, so once they’re up, I’ll add a link.
The week before last, I had a three-day teaching seminar organized by the University for new teachers. It was also at Sandbjerg, so I feel like I’ve almost spent as much time out there as I have at my office in the last two weeks. Learning about teaching is very important to me and the content _seemed _good, but unfortunately, the whole course is run in Danish and my Danish skills weren’t really up to the task. Hopefully the later parts of the course, where a mentor comes and works with us personally on our teaching will be more valuable.
There’s also quite a bit happening this week. Today and tomorrow, some researchers are coming down from the Interactive Institute Design Research Unit for a workshop titled “intangibles of everyday living”. The idea is to look for common research interests and possible cross-overs across some current and upcoming projects. Should be interesting.
…And of course, the thesis continues.
Better Z-Index & Marquee Selection
I’ve just pushed an update to stikis.com that allows marquee selection to work on Safari as well as making it more reliable on Firefox and Internet Explorer. The update also does a better job of keeping track of the front to back ordering of stikis, and fixes a number of small bugs. With this update, the site is almost fully working on Safari. The only big problem left to tackle is bold and italic formatting, which is currently broken.
As always, when addressing browser compatibility, I made some surprising discoveries about the ways that different browsers work. Here, for example are the keyCodes reported by Safari, Firefox, and Opera for the left and right apple keys.
| Browser | Left Apple Key | Right Apple Key |
|---|---|---|
| Firefox 3 | 224 | 224 |
| Safari 3 | 91 | 93 |
| Opera | 17 | 17 |
…why, why, why?
The indomitable ppk has a fairly good reference, but I’m not sure how much of his sanity he was willing to risk for a really thorough investigation. His tables don’t point out that Safari reports a different keyCode for the left and the right keys.
Show Rails TestResponse In Safari

I use a test-driven development approach to developing my web-application, stikis. As I add new features to the site, I write tests to ensure that the new code does what I intend it to do and does not break existing code. This approach to development is very well supported by the rails framework, and test-driven development is a great way to work, but testing is still difficult. When tests fail, it can be hard to understand why. Sometimes your brain hurts.
Here’s a little thing I did to make one aspect of failing tests easier to understand.
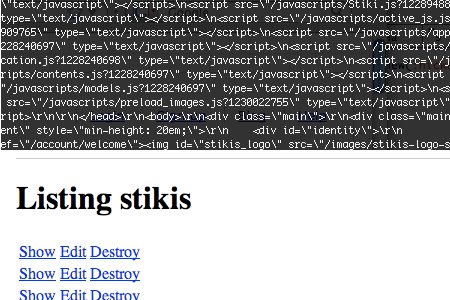
Typically, if I can’t immediately determine the cause of the error from the output of the functional test, I will set a breakpoint in the test with the debugger command and then run the test again so I can interact with the code where the test is failing. It’s particularly useful in this situation to be able to look at the TestResponse (@response) object, which includes a ‘body’ property that holds the text of the response. Typically this is the html code that would be rendered by a browser.
Although it’s really great to be able to read the contents of the response body, I’ve often found myself wanting to be able to see the response as it would display in the browser, rather than having to read and interpret html, which is what you get on the command line. Compare the top and bottom parts of the picture above so see what I mean (admittedly, the top picture would look a lot nicer if I used puts to print it).
To address this, I added a method to the @response object that does the following:
- Converts the response body to base 64 using the Base64 module from the ruby standard library.
- Format a data: URI for it using the response header mime-type and charset.
- Open Safari with the data URI as the location using the ‘rb-appscript’ gem.
Putting it all together
I first installed the rb-appscript gem…
$ sudo install gem rb-appscript
And then added the following code to my test_helper.rb file.
1
2
3
4
5
6
7
8
9
10
11
12
13
14
15
16
require 'appscript'

class ActionController::TestResponse

  def show_in_safari()
    type = self.headers['type']
    body = Base64.encode64(self.body)
    dataURI = "data:#{type};base64,#{body}"

    sa = Appscript::app("Safari")
    sa.document.end.make(:new => :document,
      :with_properties => {:URL => dataURI}
    )
  end

end
With the gem installed and the extra method included in the TestResponse object, you can type the following at a breakpoint to open the response body in Safari (assuming your breakpoint is set in the body of the test case itself).
(rdb:1) @response.show_in_safari
Limitations
There are some limitations to this:
- It’s Mac only and browser specific (but a similar approach would work for other platforms/browsers).
- If Safari isn’t already running, it will open an extra window with your homepage.
- It doesn’t give focus to the new browser window. You have to switch windows manually.
- It’s fiddling around with the TestResponse class directly, which is probably poor form.
- Linked resources such as images, javascripts and stylesheets won’t be included.
- Relative links won’t work (but absolute ones should still be fine).
Translate Doc to Dansk

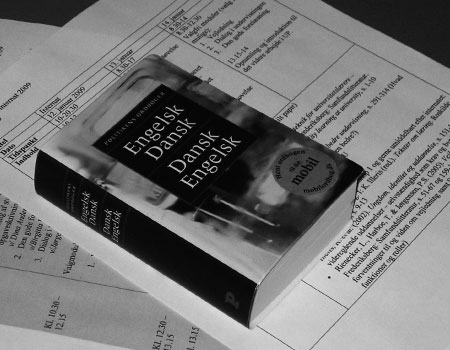
Jeg taler ikke særlig godt Dansk (I don’t speak particularly good Danish), but I work in a Danish university. Therefore, I often use Google Translate for translating emails from Danish to English. That works well, but it falls down a bit when I need to translate a document with formatting such as headings or tables.
Today I found a nifty way to translate these kind of documents too. You need an account with Google Docs and you need to be prepared to publish your document as a webpage.
- Upload the document to Google Docs. If it’s in the new docx format, you’ll need to save it as something else first. I’ve tried with html.
- For languages that use characters other than the basic latin alphabet (e.g. æ, ø, å), check that these haven’t turned into some other character in the process of being uploaded. I found that æ turned into ¾, ø turned into ¿, and å turned into . Use the find and replace function to revert to the proper characters.
- Choose the ‘Publish as web page…’ option from the share menu.
- You’ll be taken to another page with a publicly accessible link to your document. Copy this link.
- Go to Google Translate and paste the link into the text field.
- Choose the languages to translate from/to and click translate.
- You should see a translated version of your document with the formatting basically intact. Copy the url at the top and you should be able to share it with other people (as long as the document remains published).
Here is an example of a document that I translated this way.
If you have an account with some other online document editor (e.g. zoho writer) I guess a similar procedure could be used there.